More about Workflows
Workflow Studio features
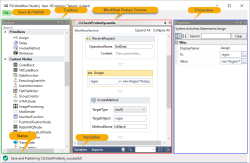
The default Workflow Studio layout is shown below.
Workflow nodes
Note | The term node is used for a workflow activity. In Microsoft terms, the Workflow Studio toolbox holds activities which when added to the workflow diagram, are represented by nodes.
- When you create a new workflow in MRI Dreamscape, the Workflow Studio opens with a new workflow project initialised. The status at the bottom-left of the designer screen shows
 .
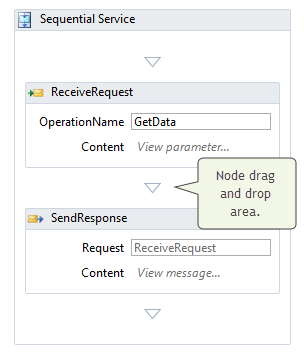
. - The default workflow comprises a .NET workflow Sequential Service node containing two nodes; a ReceiveRequest node to input data, and a SendResponse node to output data. Some default variables are also created.
- You create the main body of the workflow by dragging nodes from the Toolbox and dropping them into the Sequential Service node, between the Receive and Send nodes as shown in the screenshot below:

- When a node is selected, its properties are shown in the Properties grid.
Note | In Workflow Studio you can copy and paste nodes within the same workflow, or from a workflow in another instance of Workflow Studio. You can also use Ctrl+Z and Ctrl+Y to undo and redo changes.
For details of workflow nodes, see About Workflow Nodes.
Variables
Variables are defined in the variable designer. click in the Sequential Service to focus the scope, and then click the Variables button in the lower-left corner of the design canvas. You can see the default variables added to the new workflow.
When the variables list is open, click the Variables button again to close.
Note | If you fail to click in the Sequential Service to focus the scope, the variables list appears empty.
To add a variable, type a name and then set the .NET type from the Variable Type drop-down list.
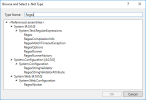
For variable types that are not listed, click Browse for Types and use the search facility:
Saving and publishing workflows
Just like web applications, you can create multiple versions of a workflow. You make one particular version operational by publishing it.
When you’ve finished editing in Workflow Studio, click File > Save, or File > Save & Publish as appropriate.
- When a workflow has been successfully published, the status at the bottom-left of the designer shows

- If the workflow failed to publish, the status shows
 and an error message is displayed with details.
Inportant: If you choose Save & Publish, and change the workflow name in the dialogue box, the workflow name will be changed, and the new name will contain all the workflow versions that were under the old name; not just the one you are editing. The old workflow name will cease to exist.
When you are editing an existing workflow, you may want to use Save & Create New Version, which leaves the workflow name unchanged but creates a new version wit the specified version name.
Note | If you exit the designer with unsaved changes, a pop-up will ask if you wish to continue, if you click Yes, all changes will be lost.
Note | Only published workflows are listed for selection in page designer controls.
Note | When you make changes to the input or output parameters of a workflow that is already assigned to a control in a web app page you must unassign and then reassign the workflow in order that the new parameters are shown. Do this by temporarily changing the assignment to a different workflow, and then back to the updated one, or change the assignment to JavaScript and then back to Workflow.
Note | When you are editing a page in the page designer, newly created workflows may not be available to page controls until the page is refreshed.


